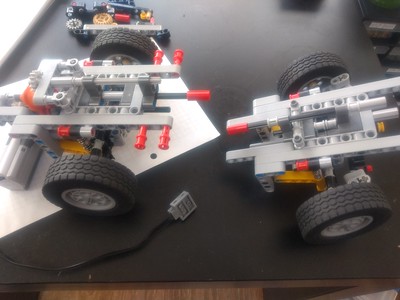
I've started building a large Technic vehicle and I'm going to document the building process here and share with you all how I go about planning and building something like this.
This began last year with the acquisition of the infra-red-controlled Technic bulldozer from 2007 (
8275). I've had it in the back of my mind that I'd like to build a large motorised Technic vehicle for years, but never had the necessary motors, or any IR parts.
For inspiration on what to build, I went back to large-scale Technic trucks and construction vehicles I remember being in awe of in my early teens, circa 2001-2002. To set the scene, broadband hadn't reached Ireland yet, and in the online world of Lego,
lugnet.com was still a big deal,
brickshelf.com was THE site for hosting your creations, and most AFOLS who weren't on there had a Geocities page.
Around this time I discovered Technic models by Jennifer Clark (the most impressive at the time being her
Hook Lift Truck. Her detailed write-up taught 13-ish-year-old me a very significant proportion of what I now know about Technic and how various mechanisms work, and very occasionally I refer back to that site to this day for reference.
So in honour of that great Technic creation, I've set upon building a MAN Hook Lift truck. For those of you not in the know, it's like a dump truck, except that on the back is essentially a big skip, which can be both "dumped" in the sense you'd expect, and rolled off the back of the truck altogether. I also plan to add a crane to it behind the cab, something like
this, and where you have a crane you must have outriggers to prevent the vehicle from
tipping over.
I plan to use four motors, plus pneumatics for the crane; each motor can perform more than one function, since not all functions will be required at any one time. Motorised functions will be:
- Drive
- Steering
- Tipping
- Extending outriggers
- Lowering outriggers
- Rotating the crane
- Pneumatic compression
- Switching each motor from one gear to another
Each motor will perform two functions. "How can the motor which switches functions also perform two functions itself!?" I hear you ask. With the first part of a mechanism that I
posted recently! Both the function selector and the pneumatic compressor only need to turn one way, they have no need for a reverse, so I can use a mechanism which changes the output depending on direction.
I've set myself a few goals, number one being that I'm going to use the modern studless/brickless style of Technic building, which, when it comes to MOCs, I'm not at all accustomed to, but which is far more versatile than the old Technic brick style. Other goals include having a decent turning circle (most Technic sets have very poor steering lock due to the maximum angle a Lego ball socket and ball joint can turn in two out of three planes of motion), and making the model as modular as possible without compromising on strength and stability (this will rely a lot on
pins with bushes connecting different modular sections). One concern was that I would have to give the model unrealistically large wheel-arches to accommodate the steering, but a test showed that a half-stud gap between the wheel and the inside of the arch was sufficient, as long as the interior of the wheel well was more roomy. You can see the wheel just clears the pink piece in this test:

To kick this project off I started with attempting to scale the model. I found
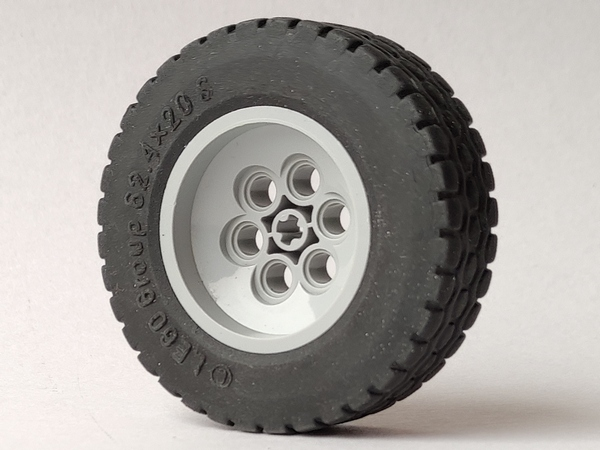
this blueprint and from that I estimated the size when using these wheels, which are 62.4mm in diameter (about 7.75 studs):

To cut a long story short, I got my measurements wrong (only realising a couple of days into building!), particularly with the width of the vehicle, which is better suited to 19 studs wide than 17 (it should be just over 18 studs wide but modern studless Technic works best in odd numbers). Here's the original 17-stud-wide plan:

I discovered when re-estimating the scale that famed Technic model-builder and blogger Sariel has an excellent
scaling tool on his website, so armed with this knowledge I produced this, as well as a similar front-view version:

I had planned to incorporate a feature some of you may be familiar with, called Ackerman steering geometry. For the uninitiated, when you steer, your wheels trace the outlines of imaginary circles on the road. Your outside wheels trace a larger circle than your inside wheels, therefore the wheels should turn at different angles:

Ackerman geometry is achieved by attaching the steering rack at points on non-parallel lines -
this Eurobricks topic shows how to correctly line up the pivot points. However, after a visual test I concluded that at my scale (and particularly due to the length of the vehicle), the wheels appeared to be so close to parallel that the impact of Ackerman geometry was negligible, so I decided not to bother with the added complication.
One of the main non-motorised features of the truck will be suspension, and in my first iteration of building the front axles I had each axle connected by four soft springs to the chassis, as well as one
steering arm with towball socket. Here's one of the axles in its early stages:

It turned out that this was a bit unstable though and my wider second iteration uses three socket arms and two hard springs per axle. (Actually I currently have yellow 5L liftarms as placeholders for the socket arms, they're in the post from Bricklink...)

Fitting the motor to the front of the truck along with all the gearing required to switch functions and have two motor outputs (one for steering, one for crane rotation) was tricky, so I modeled the gears and axles without any supporting structure in stud.io first - this saved loads of hassle, since when you're designing gearing mechanisms, most of the time is actually taken up fiddling about with connectors and liftarms to get them into place, and then taking those apart over and over to modify the gearing until it works. This was surprisingly simple in the end:

The system is colour-coded in the stud.io model - red is directly powered by the motor, orange is the function selection axle, green drives the turntable and black drives the steering.
The next challenge is how to transmit steering power - initially I was linking a liftarm to the Technic axle which steers to each steering arm, but this seems to put a lot of strain on parts so I'm looking at using a rack and pinion with ball joints, but fitting that in and connecting the ball joints so that they're facing upwards instead of sideways (to avoid the problem of a poor turning circle) is proving challenging. And after building the front two axles of the truck twice now, with head-melting technical issues, I'm taking a break from Tehcnic for a couple of days.
Watch this space, further updates to follow!